Treehouse
My kids have been asking for a treehouse ever since we moved into our house. I was supportive, but knowing it would be a big project, I struggled to muster the energy to get started. A few weeks ago my brother came to visit and helped us finally make it happen. Now we have a treehouse! It’s a simple platform with a trap door and wooden ladder on one of the oak trees in our side yard.
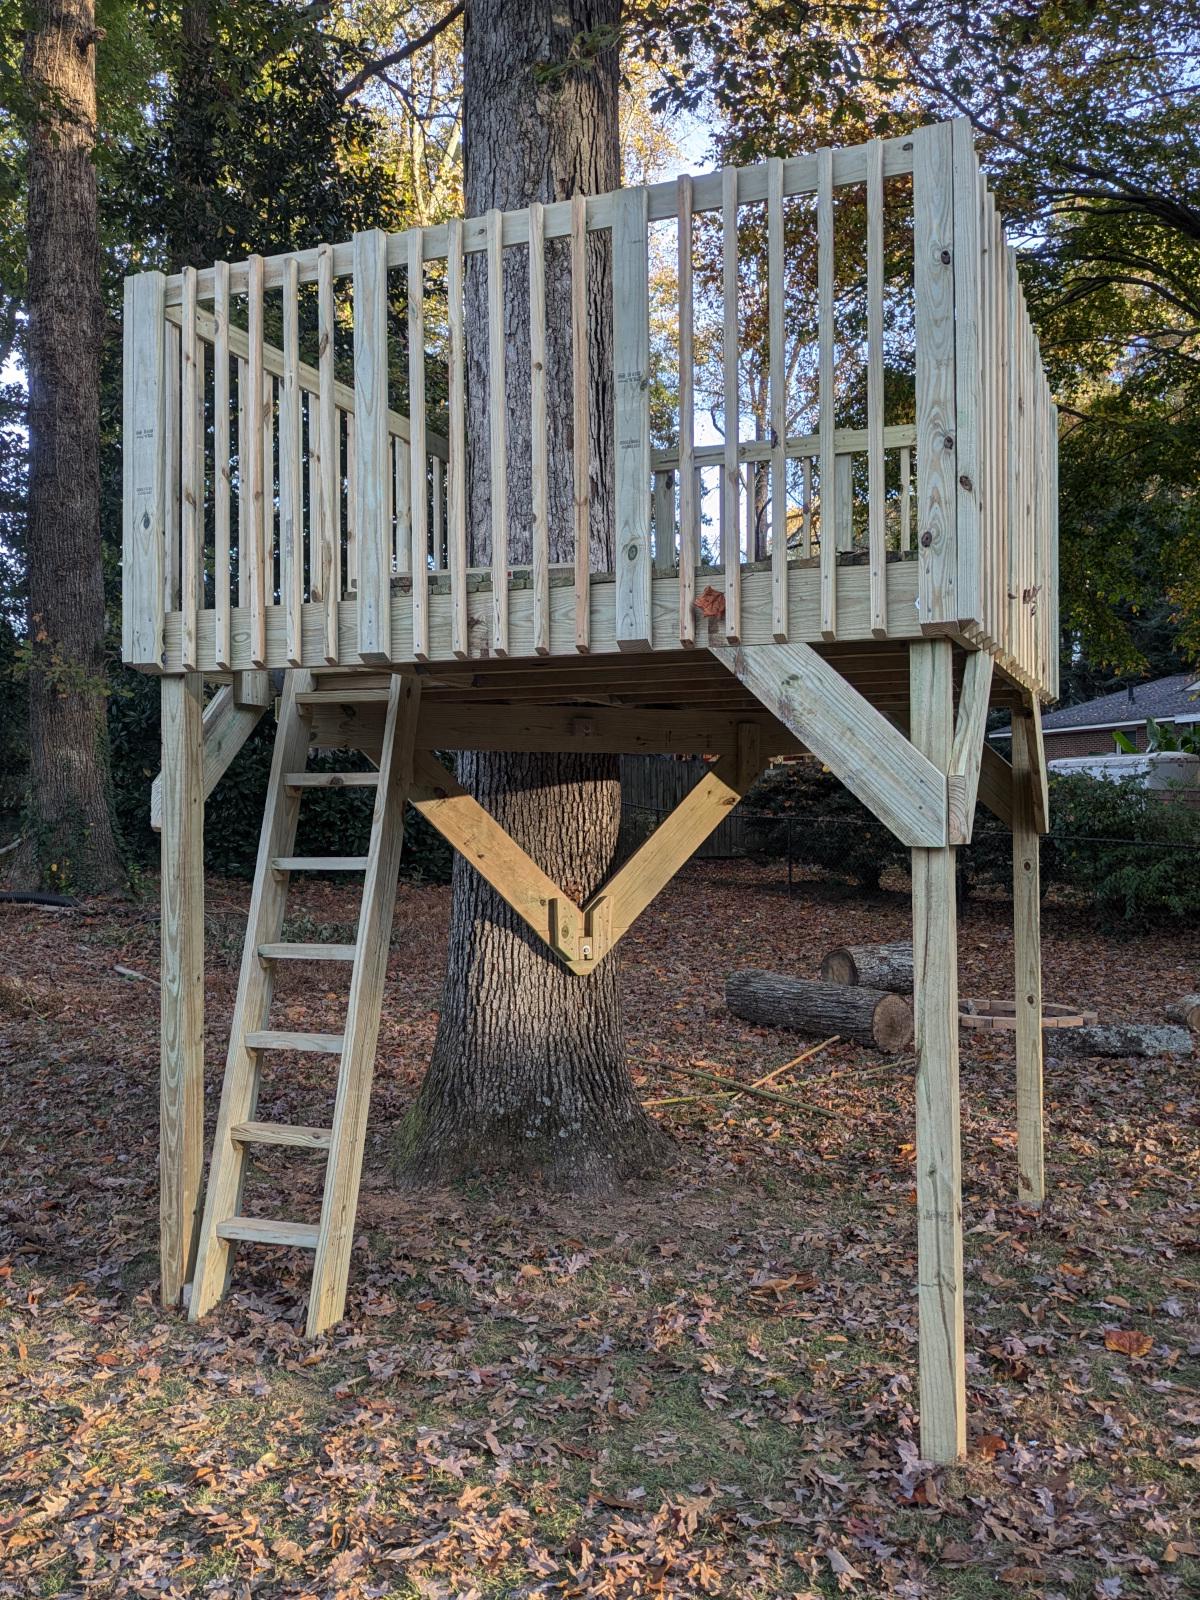
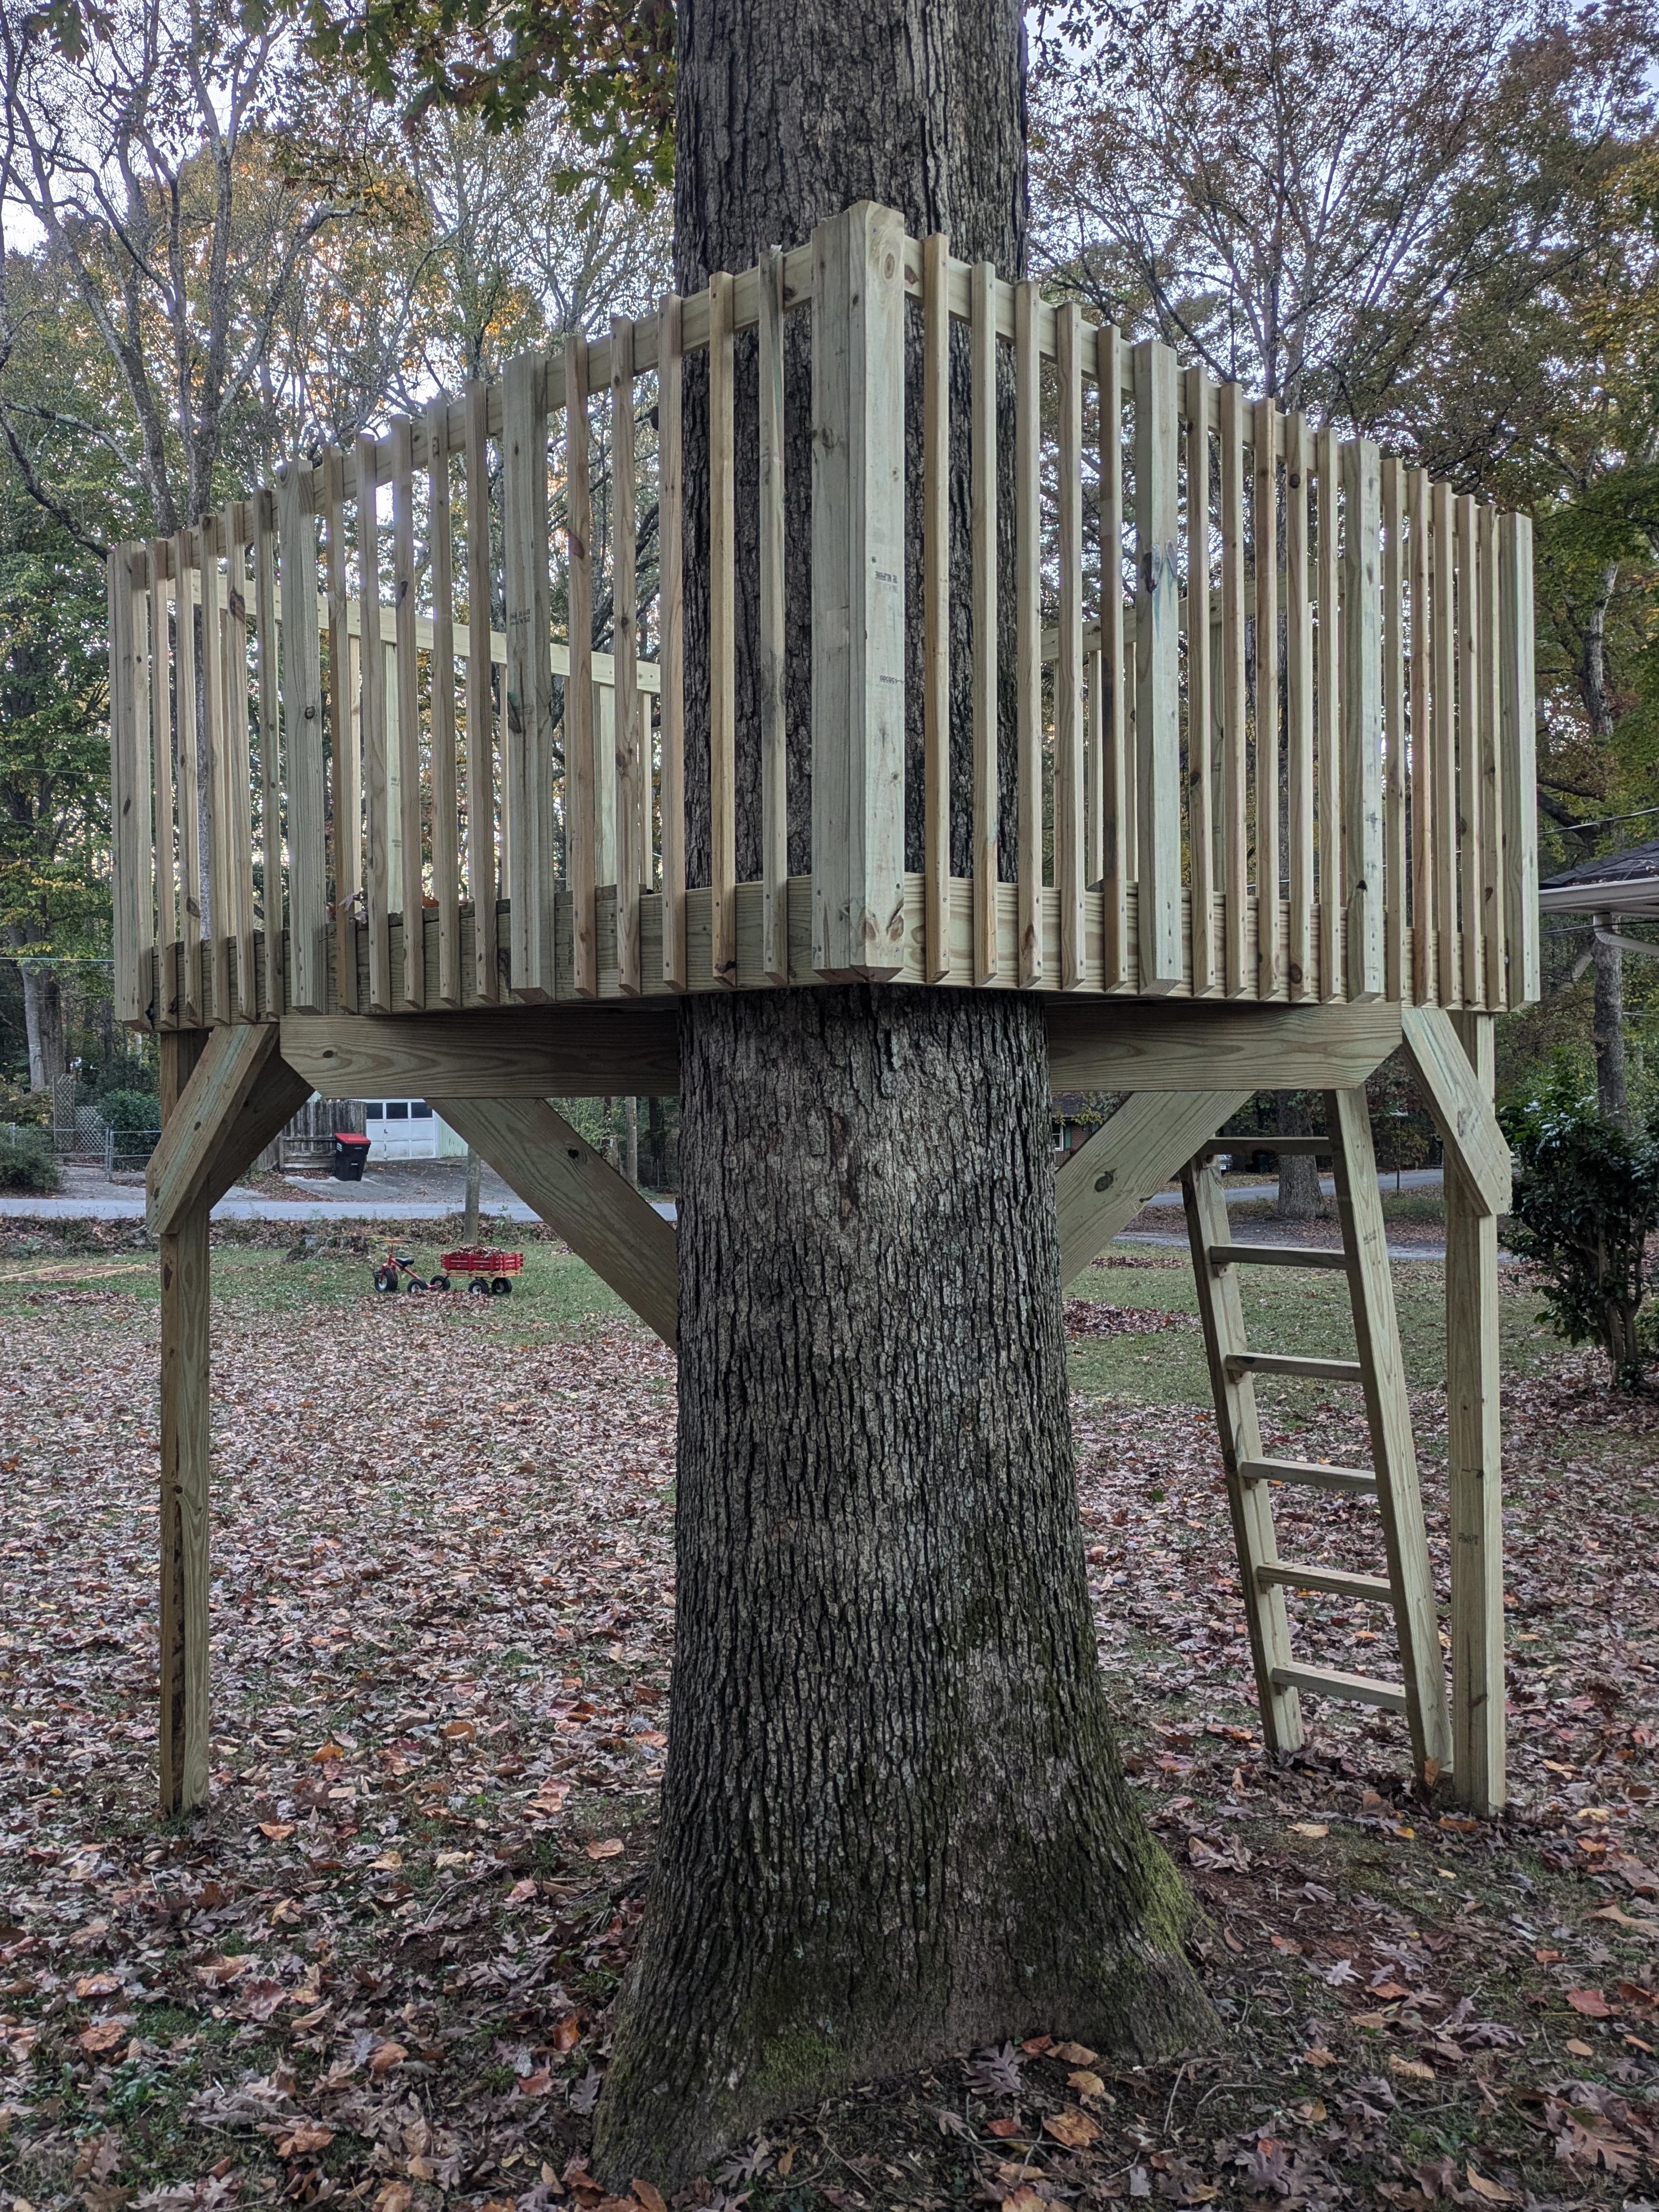
I’d been given Black & Decker’s The Complete Guide: Build Your Kids a Treehouse book, and it was a big help for our planning. The book was also a bit overwhelming; it had me constantly second guessing whether our structure would be sturdy enough. On the whole, I’m glad to have had it as a reference, though.
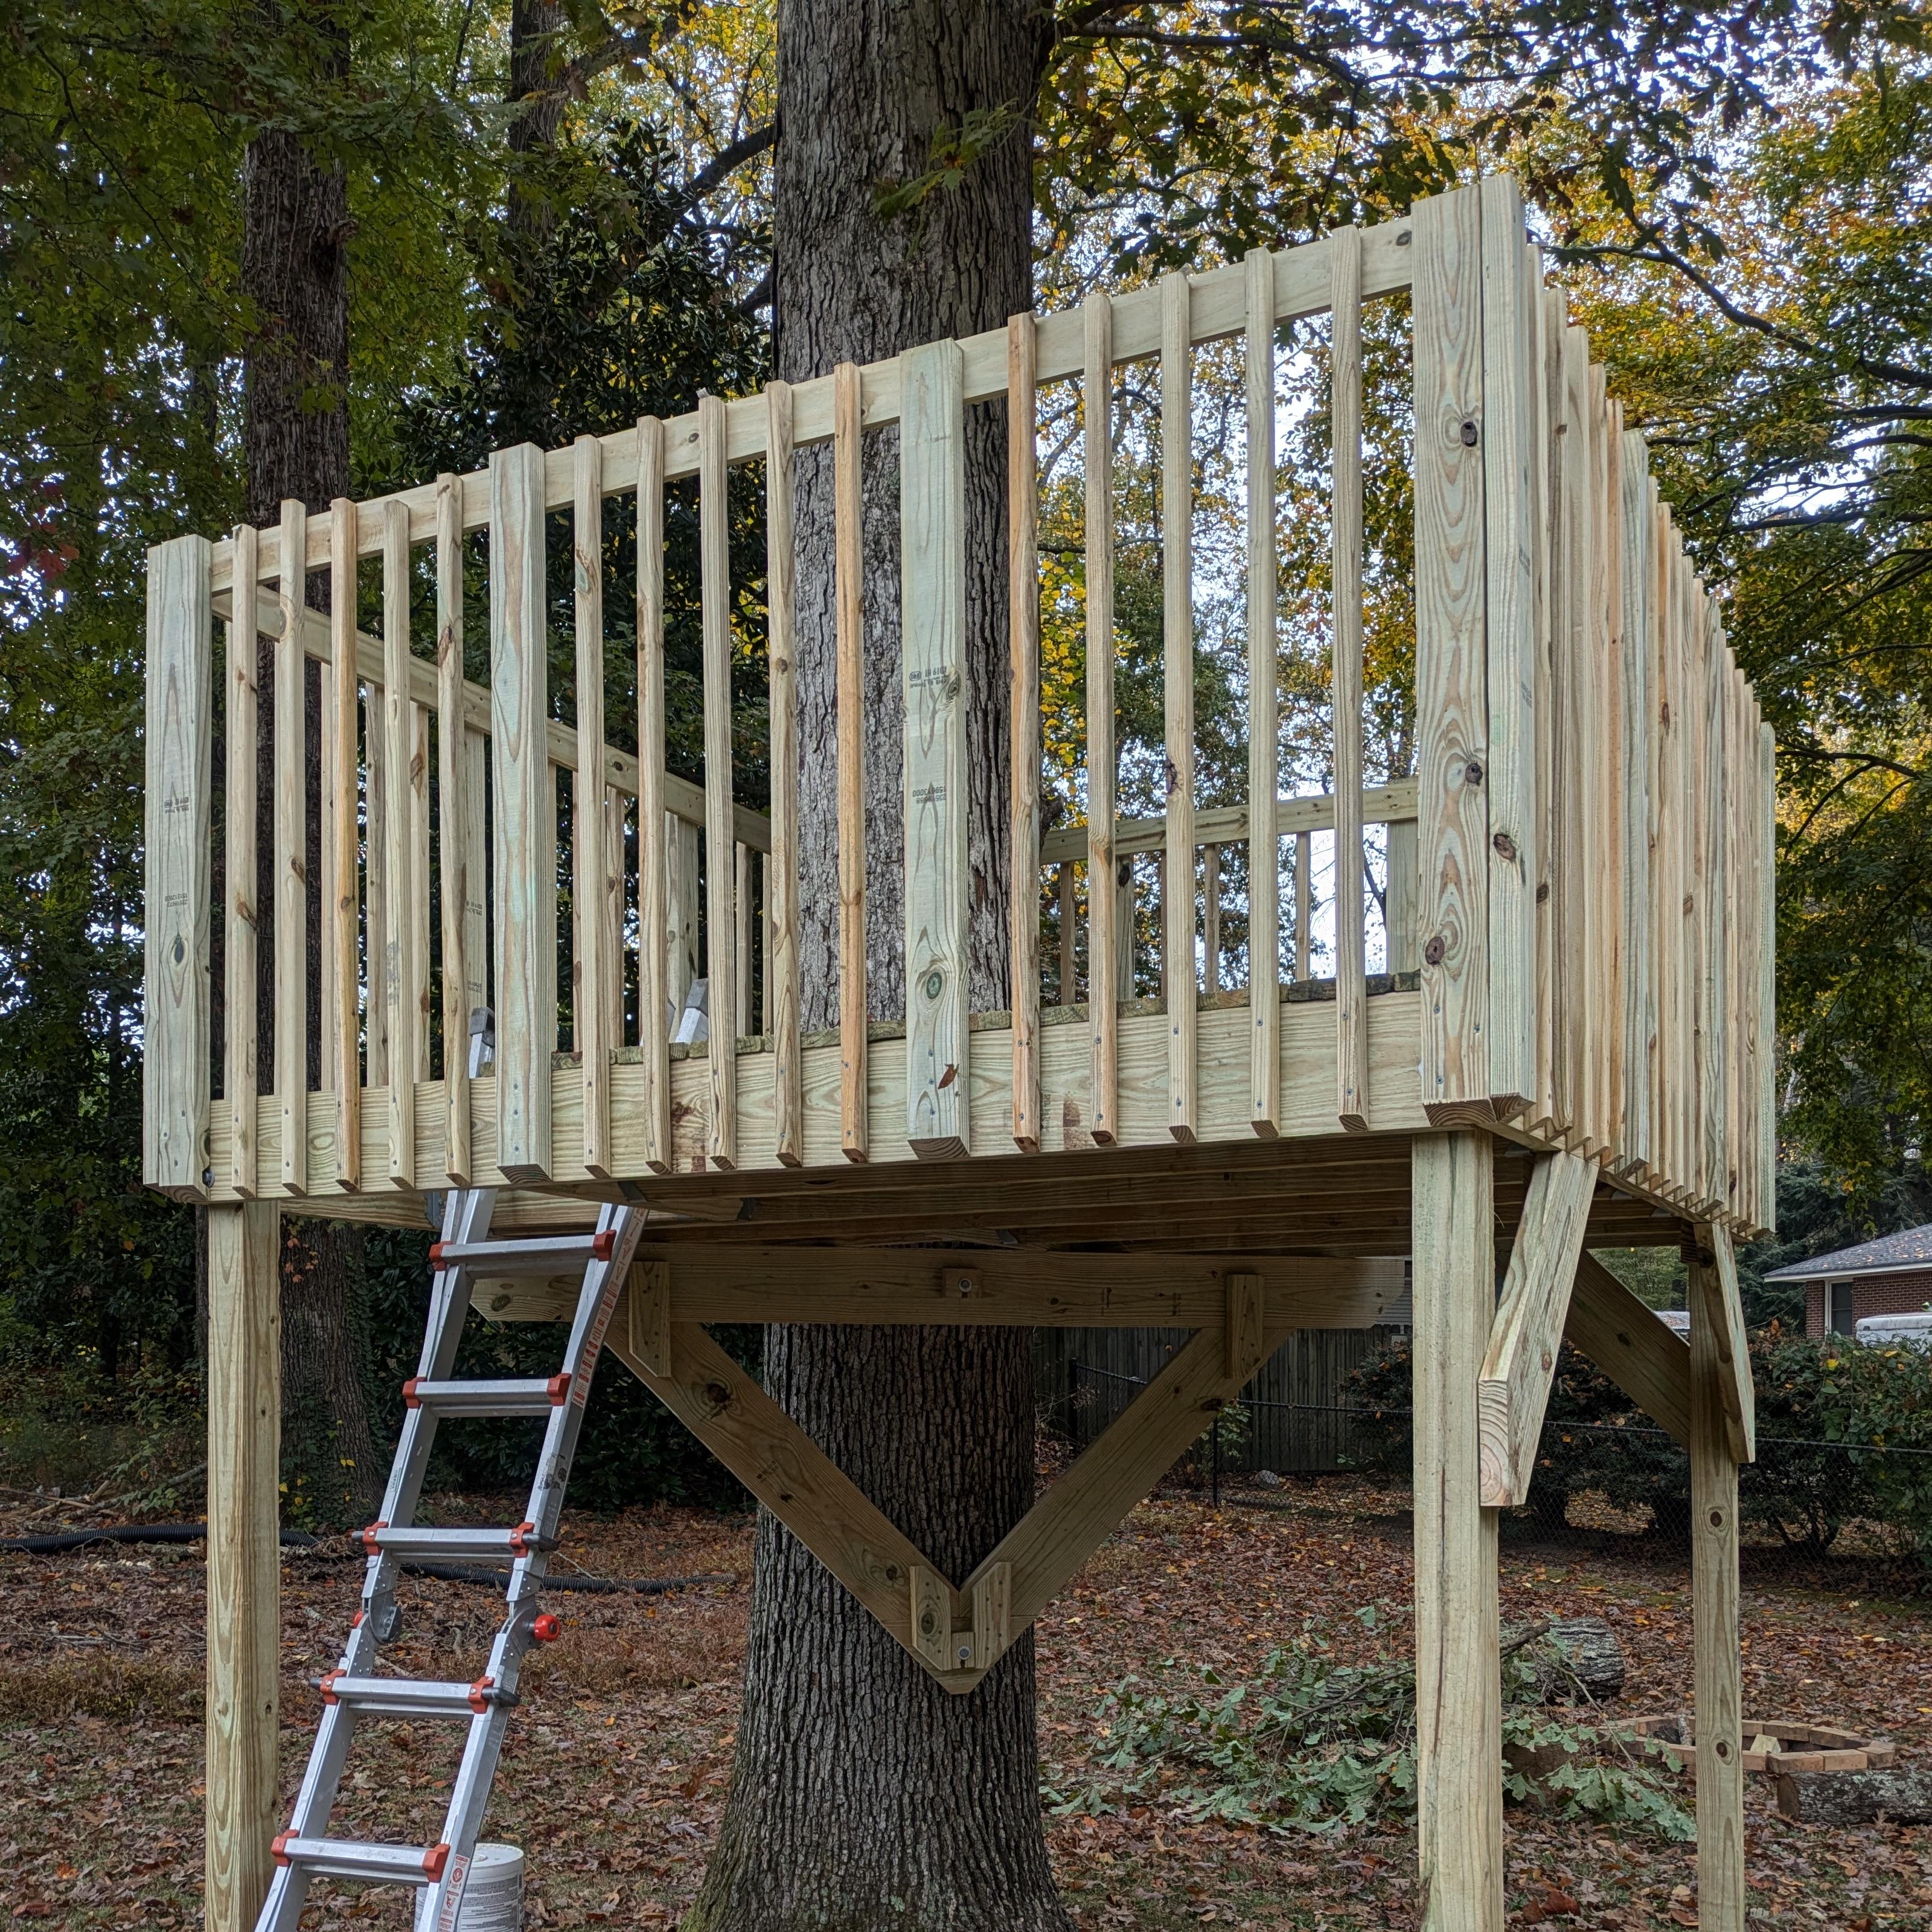
We wanted to build a simple platform with railings – no walls or roof – and started with the trickiest design question: how to support the platform. Before getting started, I’d envisioned a platform with the tree in the middle as the only support. After a bit more thought, though, we settled on using the tree to support one corner and holding the other three corners up with posts. I was excited about this design because it would hopefully simplify things and because it would provide a fun space to play under the platform as well.
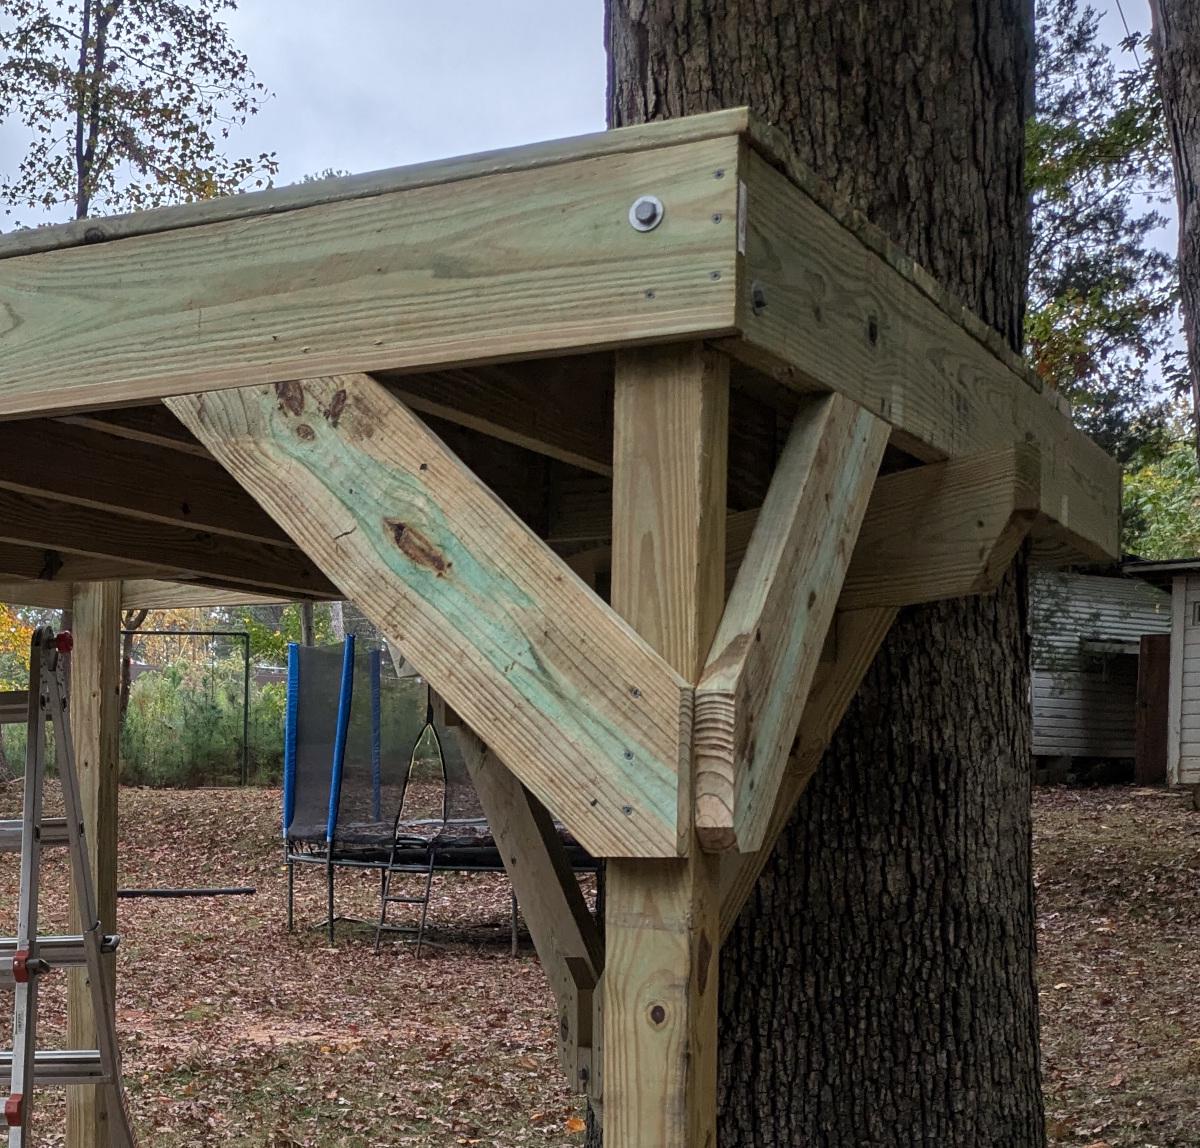
Based on guidance from the Black & Decker book, we brainstormed ways to attach the platform to the tree so that as the tree grew or moved slightly in the wind, the platform could stay put relative to the posts. Eventually we settled on attaching a triangular support structure, built with 2x8s, to the tree and letting the platform rest on top of that. The support and the platform are only held together by gravity, so the platform can theoretically slide around on the support as the tree moves/grows.
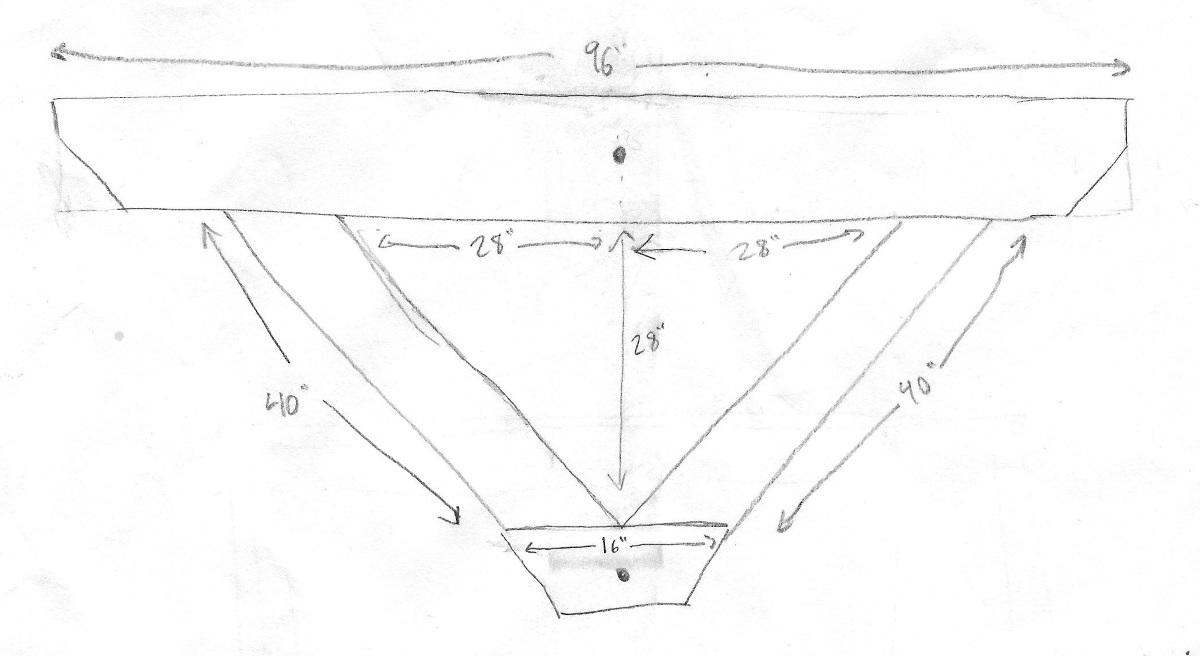
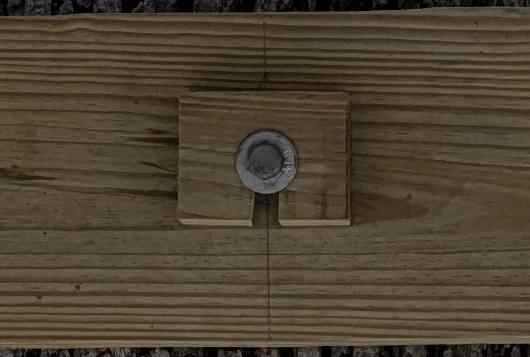
The triangular support is attached to the tree with two 1/2-inch lag screws. The screws are 8 inches long, but the drill bit we had only penetrated about 5 inches into the tree, leaving the head of the screw protruding an inch or so from the support. (It became incredibly difficult to make any progress with the screw once we reached the end of the drilled hole; the oak tree’s wood is too strong.) We wanted the support to be snugly attached, but we didn’t want to return to the store for shorter screws. We didn’t want to unscrew the screws either – again, the tree’s dense wood makes for slow progress – so we fashioned some wood “washers” and slid them over the screws.
Once we had the support attached, we built a square frame of 2x8s around the tree, using some scrap wood to keep the corners at 90 degrees. Then we lifted the square onto the tree support, using the ladder to hold up the other side of the square (it was just the right height), and ran plumb lines down from the corners to mark where to dig the post holes.
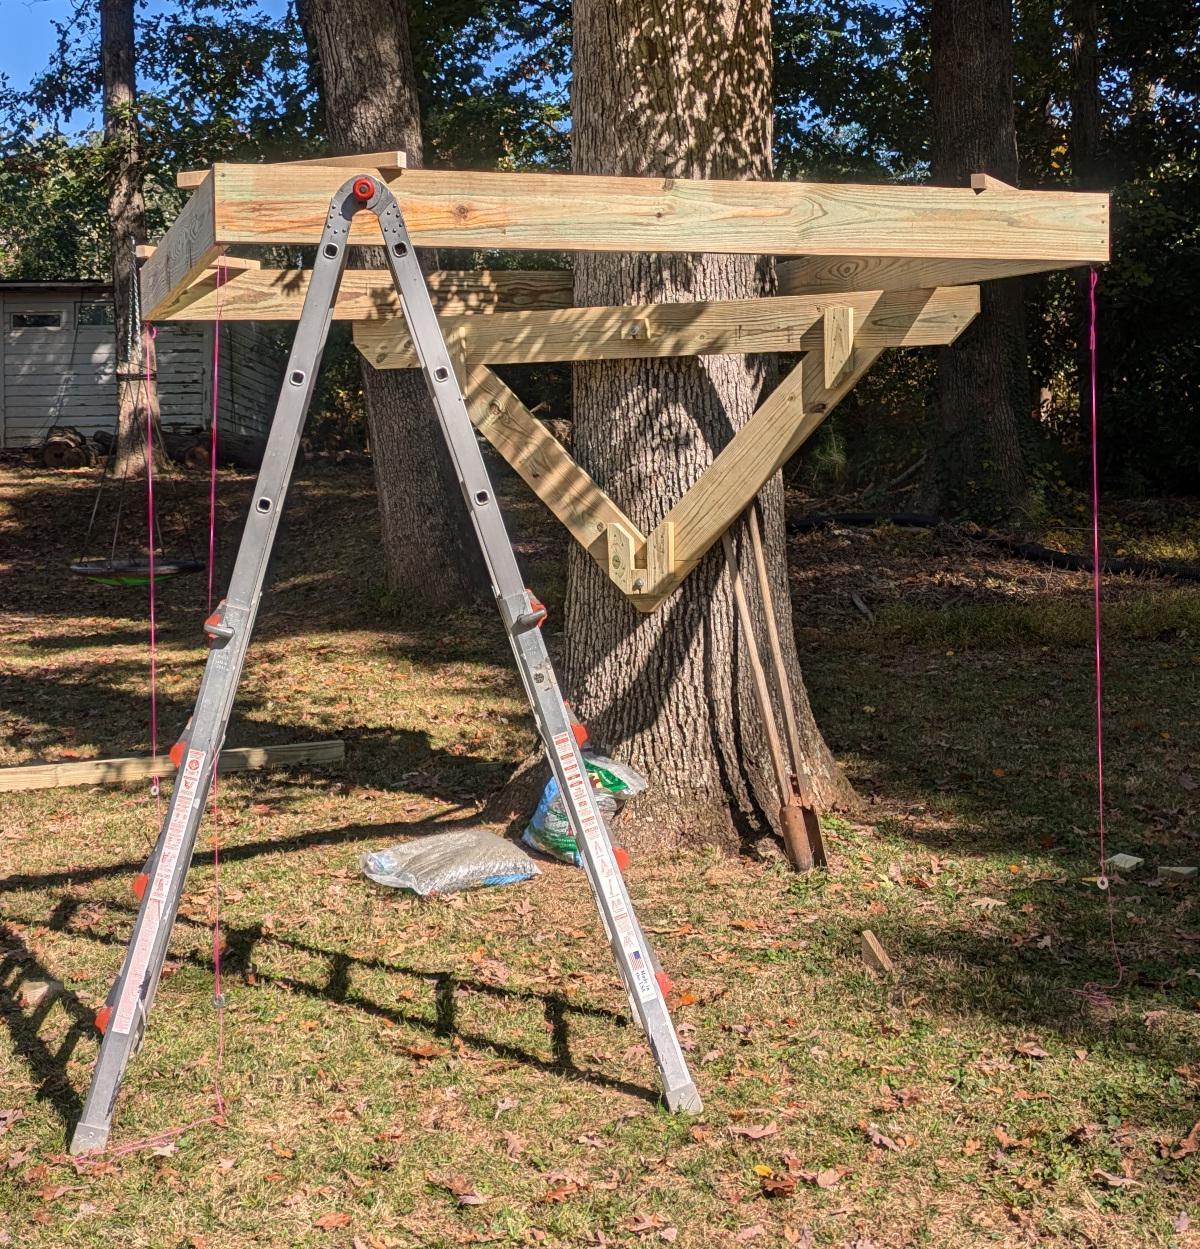
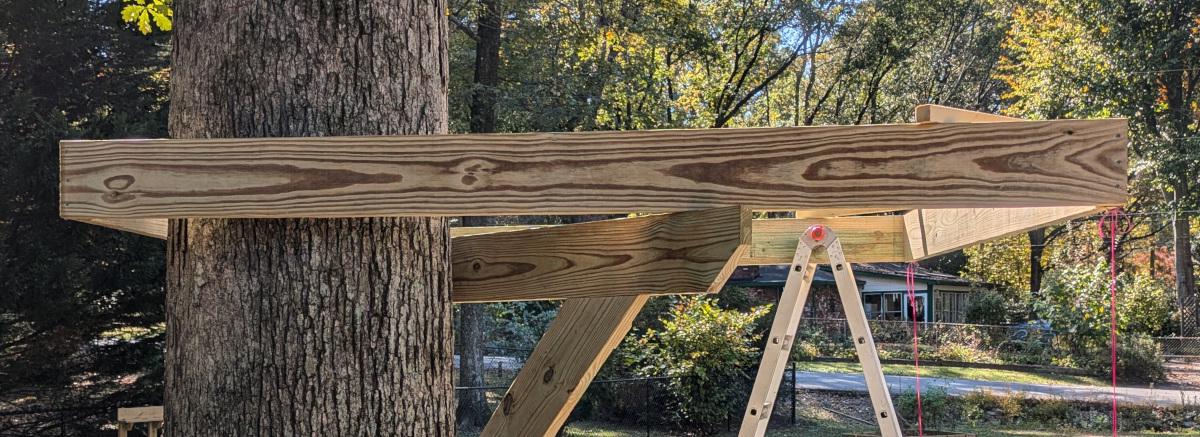
Next we dug three 28-ish-inch holes, stopping along the way to replace the handle of the post-hole digger that my neighbor lent us after we broke it. We put a few inches of gravel at the bottom of each hole, trimmed the 10-foot 4x4 posts to the correct length, and cemented them in. After the cement dried, we attached the corners of the square frame to the posts using a few normal wood screws and one 4-inch-long 1/2-inch lag screw for each 2x8-to-post connection.
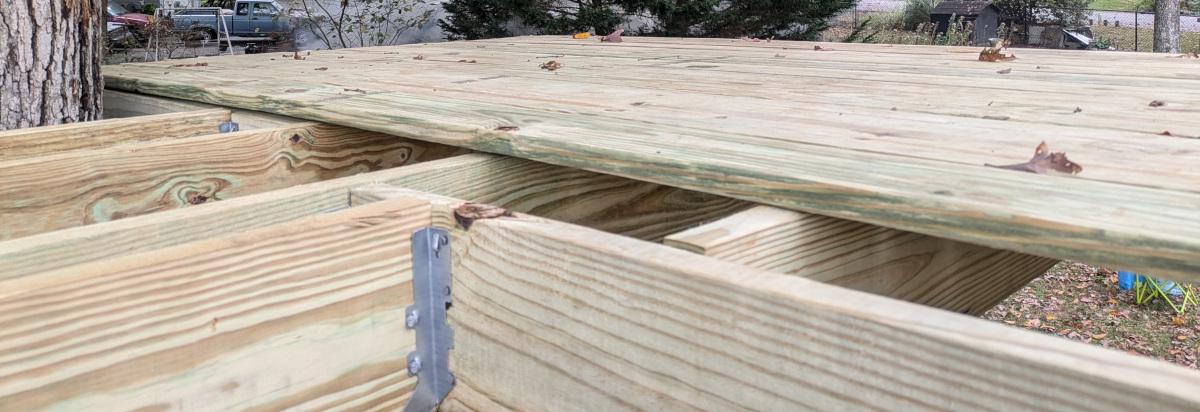
With the square frame securely anchored to the posts (and the temporary ladder support removed), we moved onto the joists. We used 2x8s spaced 16 inches apart, with two extra joist headers to accommodate the tree and the trap door opening.
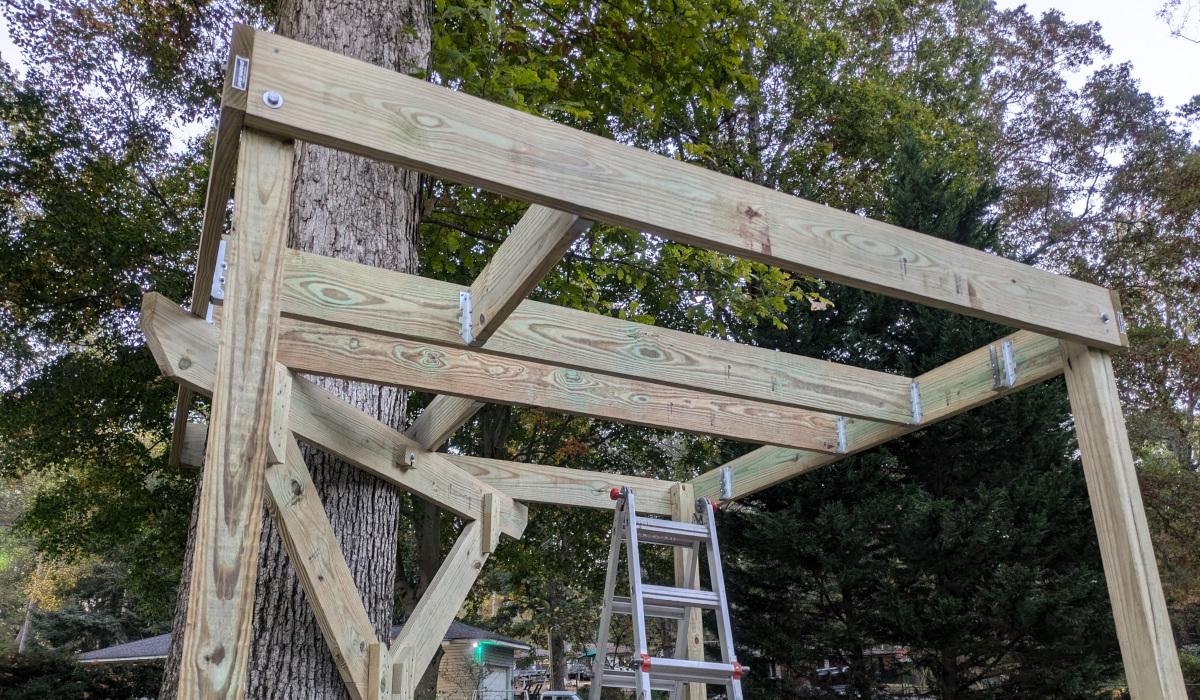
Installing the joists was a bit of a pain. Neither of us had ever used the metal joist brackets before, and we had to figure out how to work with them. We got it done eventually, with all of the joists mostly level.
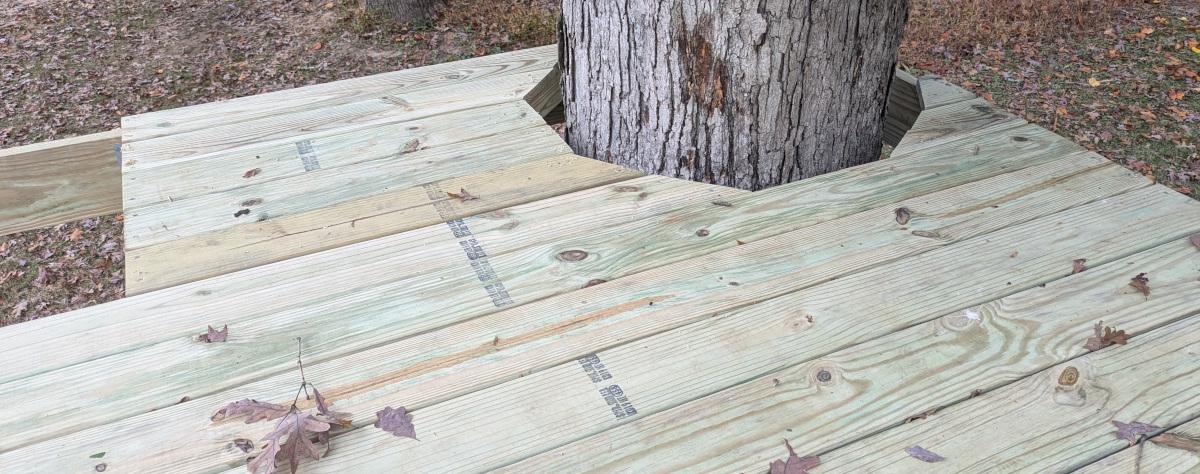
Once we started putting on the decking, it started to feel more like a real treehouse. We used 5/4-inch decking boards and left a slight gap between them to prevent rain water from accumulating too much. We also installed a few diagonal 2x4 supports in the joist frame to hold up the ends of the decking that are cut at angles to fit around the tree trunk.
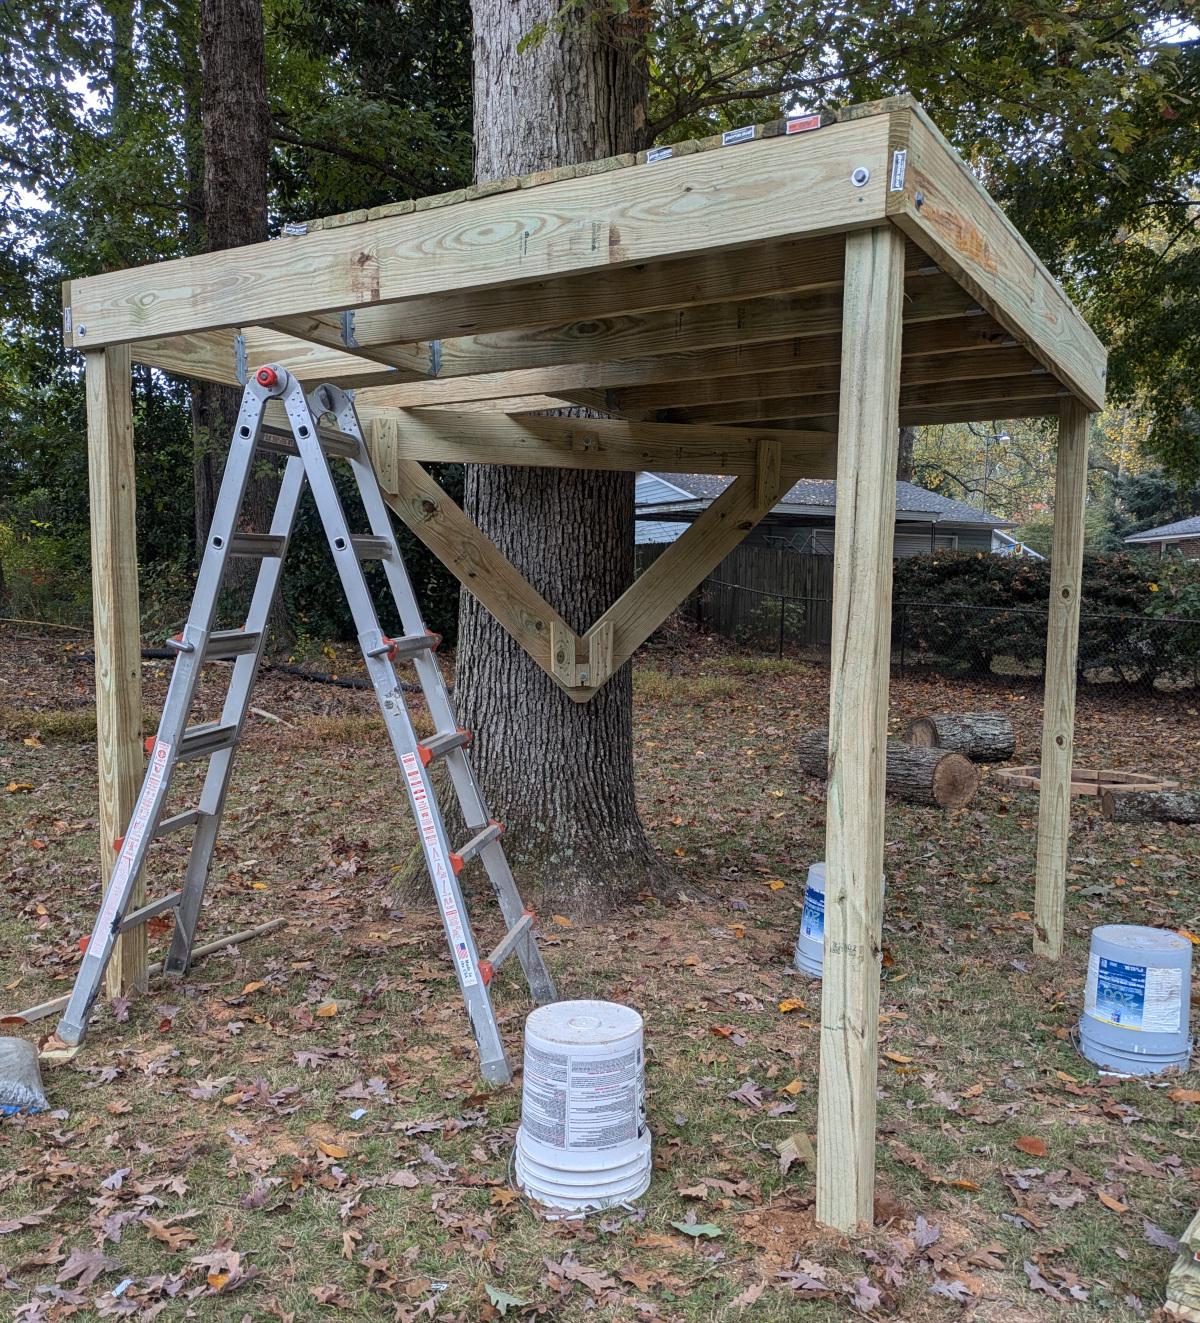
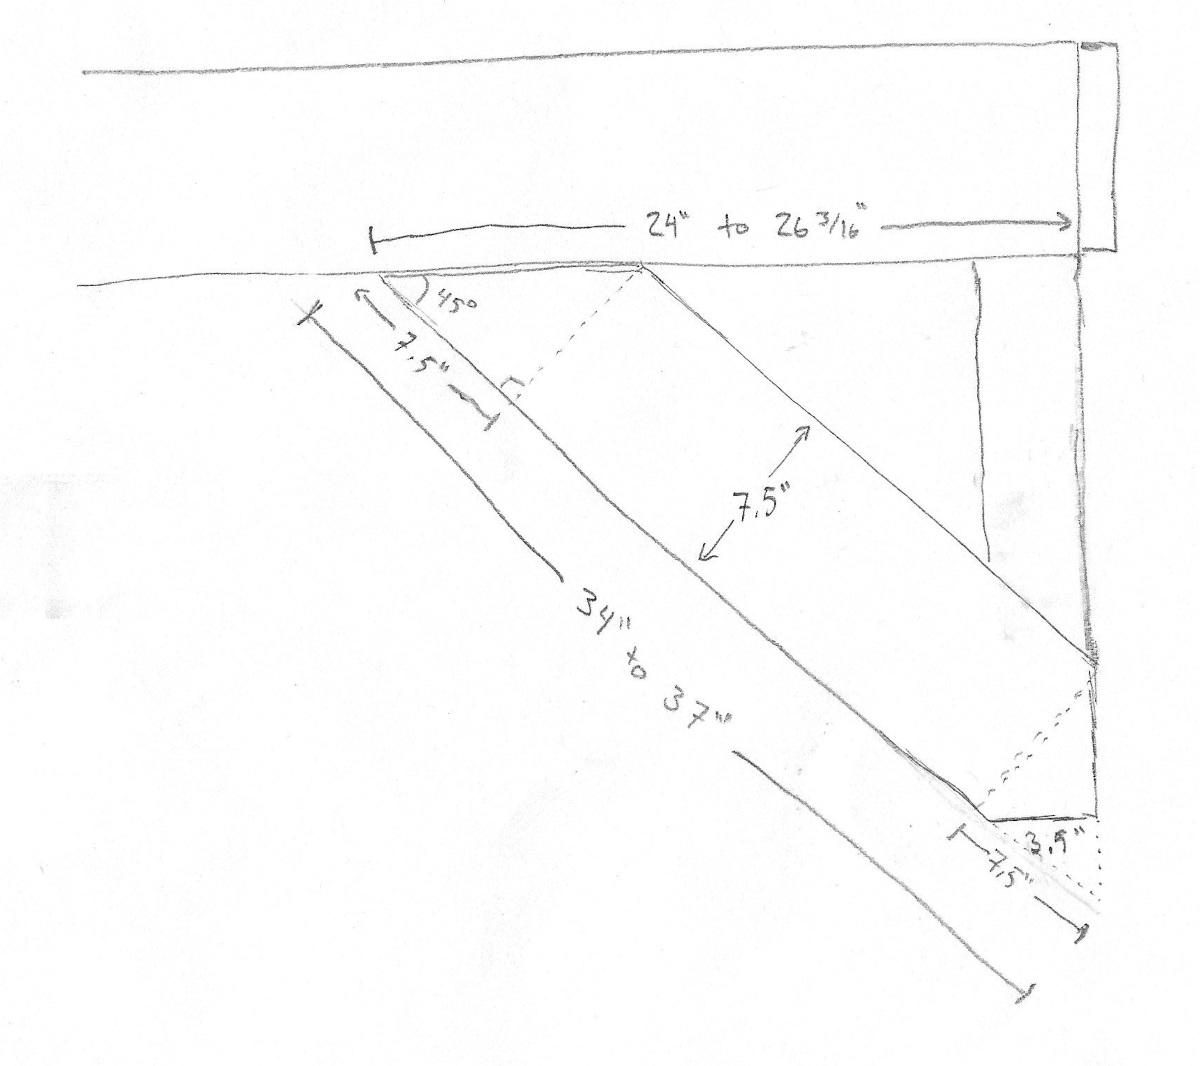
The Black & Decker book encouraged adding diagonal supports from the posts to the joist frame as well, so we did that. I’m not sure how much they’re really doing structurally, but they look nice. (At least where I didn’t mess up the cuts on the ends that attach to the post…)
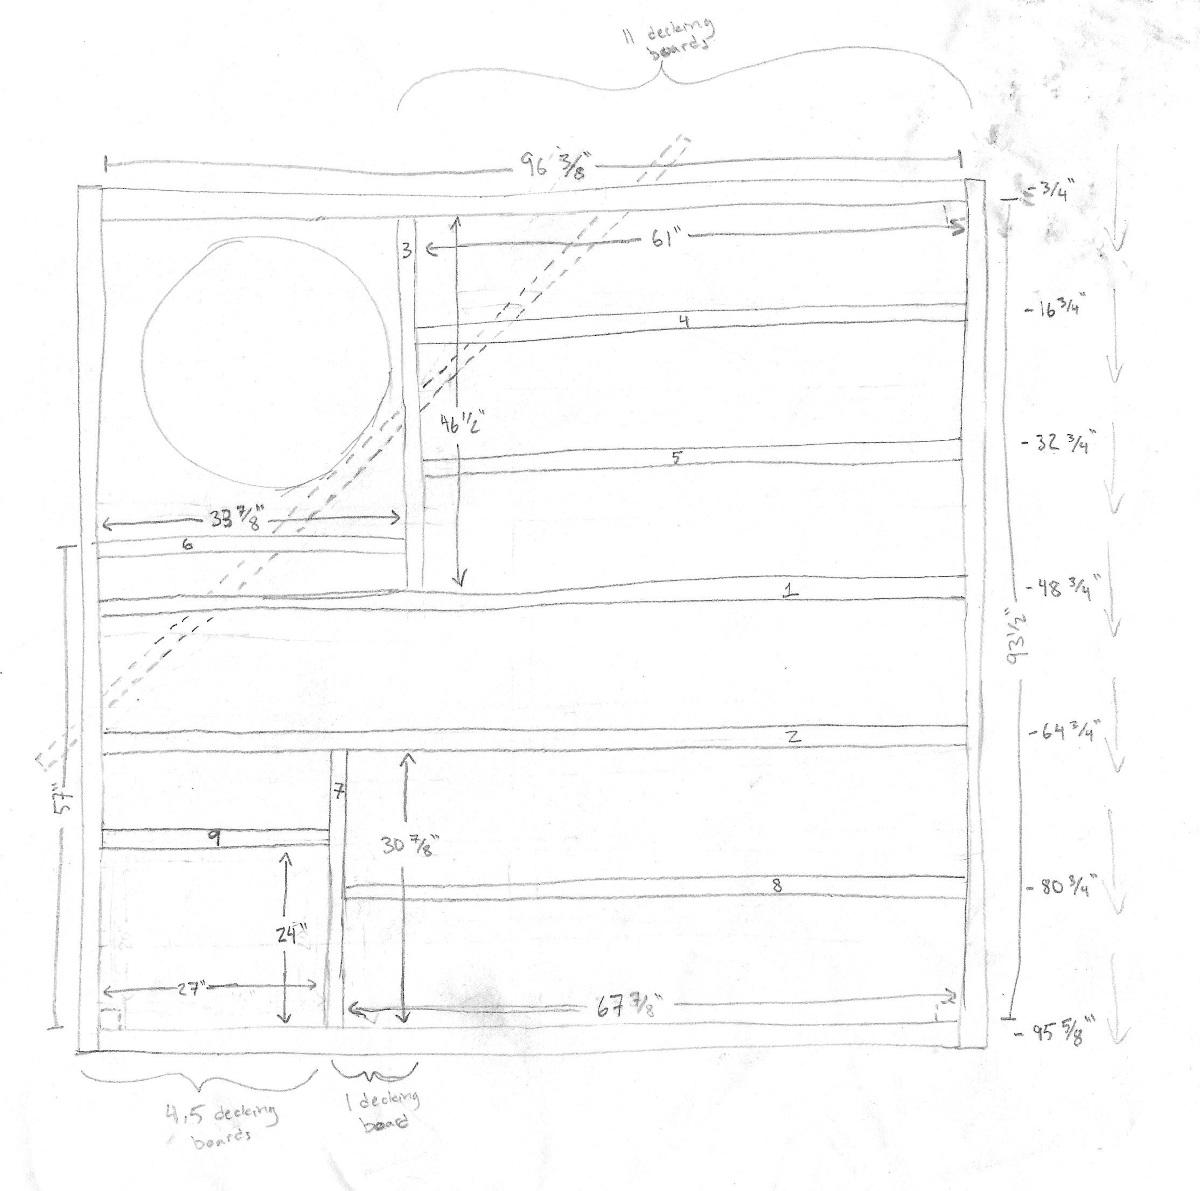
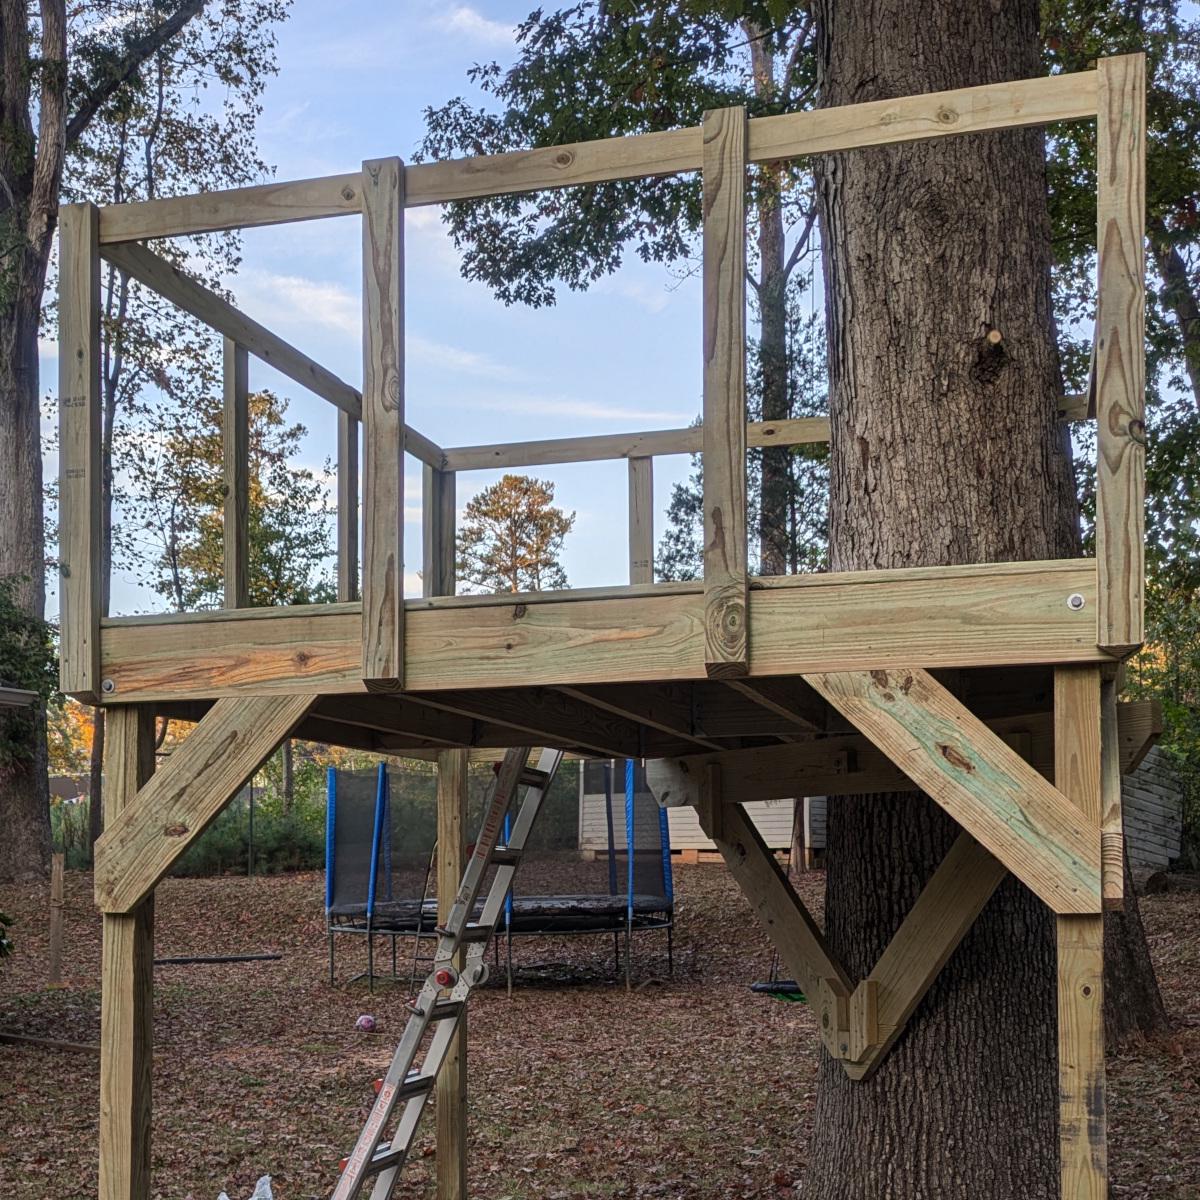
By this point my kids were already climbing up on the platform all the time, so we hurried to build the railing. I wound up creating a drawing of the platform on my computer so that I could play around with different spacing for the balusters. A combination of 2x4s and 2x2s fit nicely with a 3.5-inch gap between each baluster. We used 1x4s for the banister at the top.
Last but not least, we built a ladder and trap door. The ladder is made of 2x6s on the sides with 2x4 rungs spaced about 11 inches apart. It’s at a slight angle for easier climbing. We contemplated using a rope ladder instead, which would have been harder to climb but potentially more fun. In the end, we decided that we wanted to make it easy for anyone to climb up.
The trap door is made of the same decking material as the rest of the floor, connected with two 2x4s, and attached to the floor with a pair of tee hinges. We attached another pair of 2x4s to the joists to support the trap door when it’s closed. A small gap between one of the door’s decking boards and the floor allows lifting the door from its closed position.
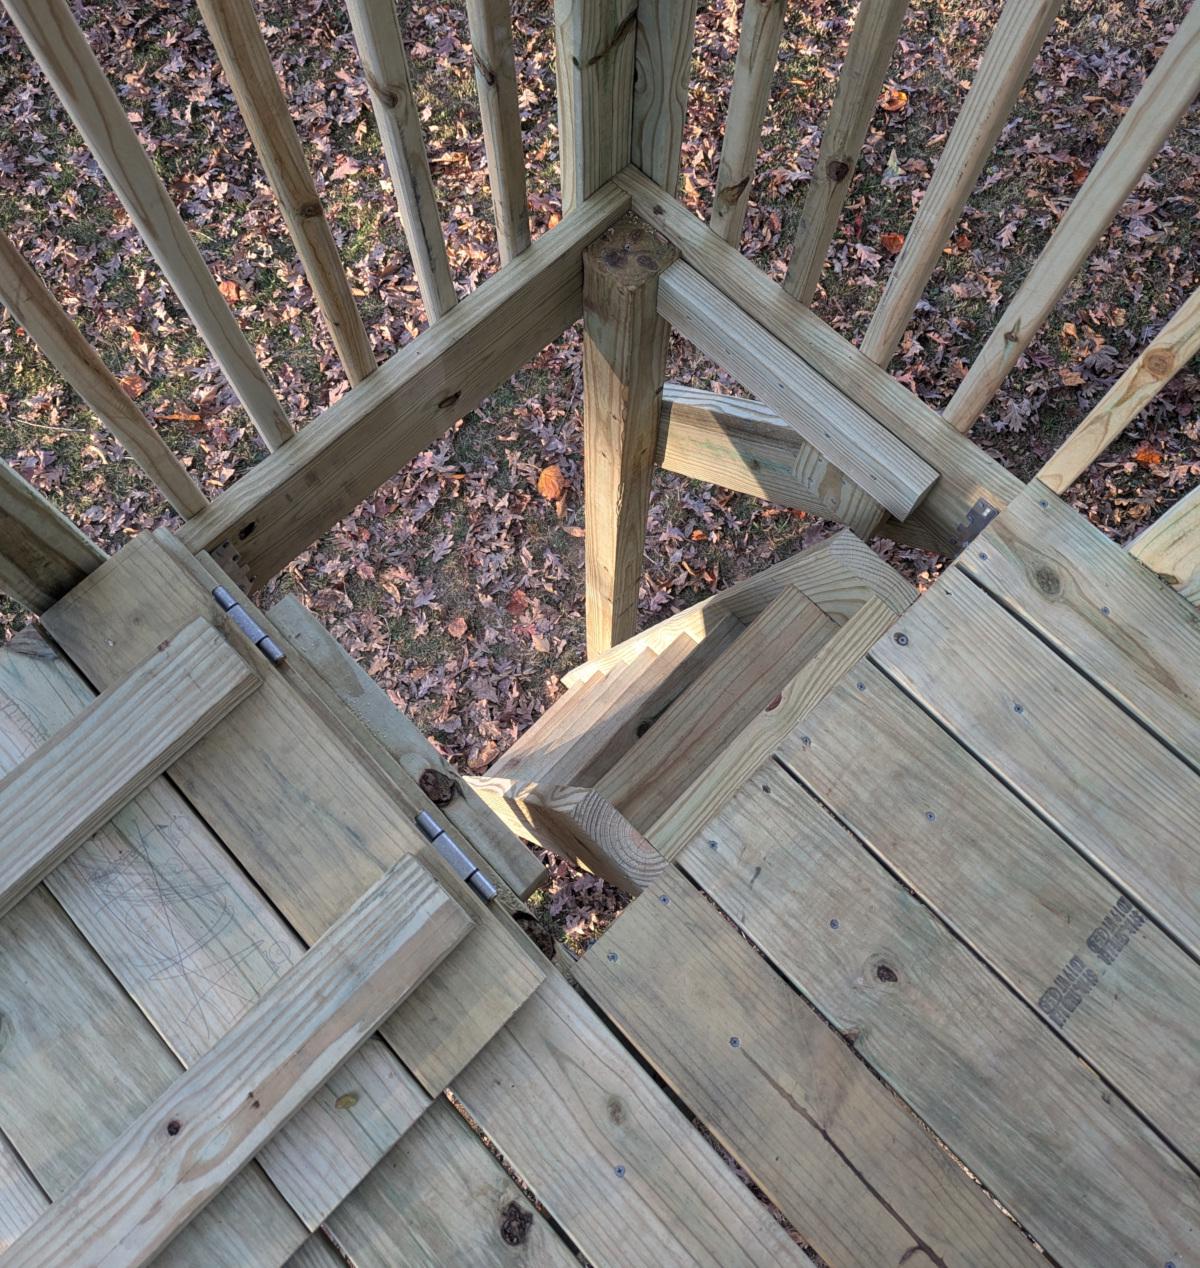
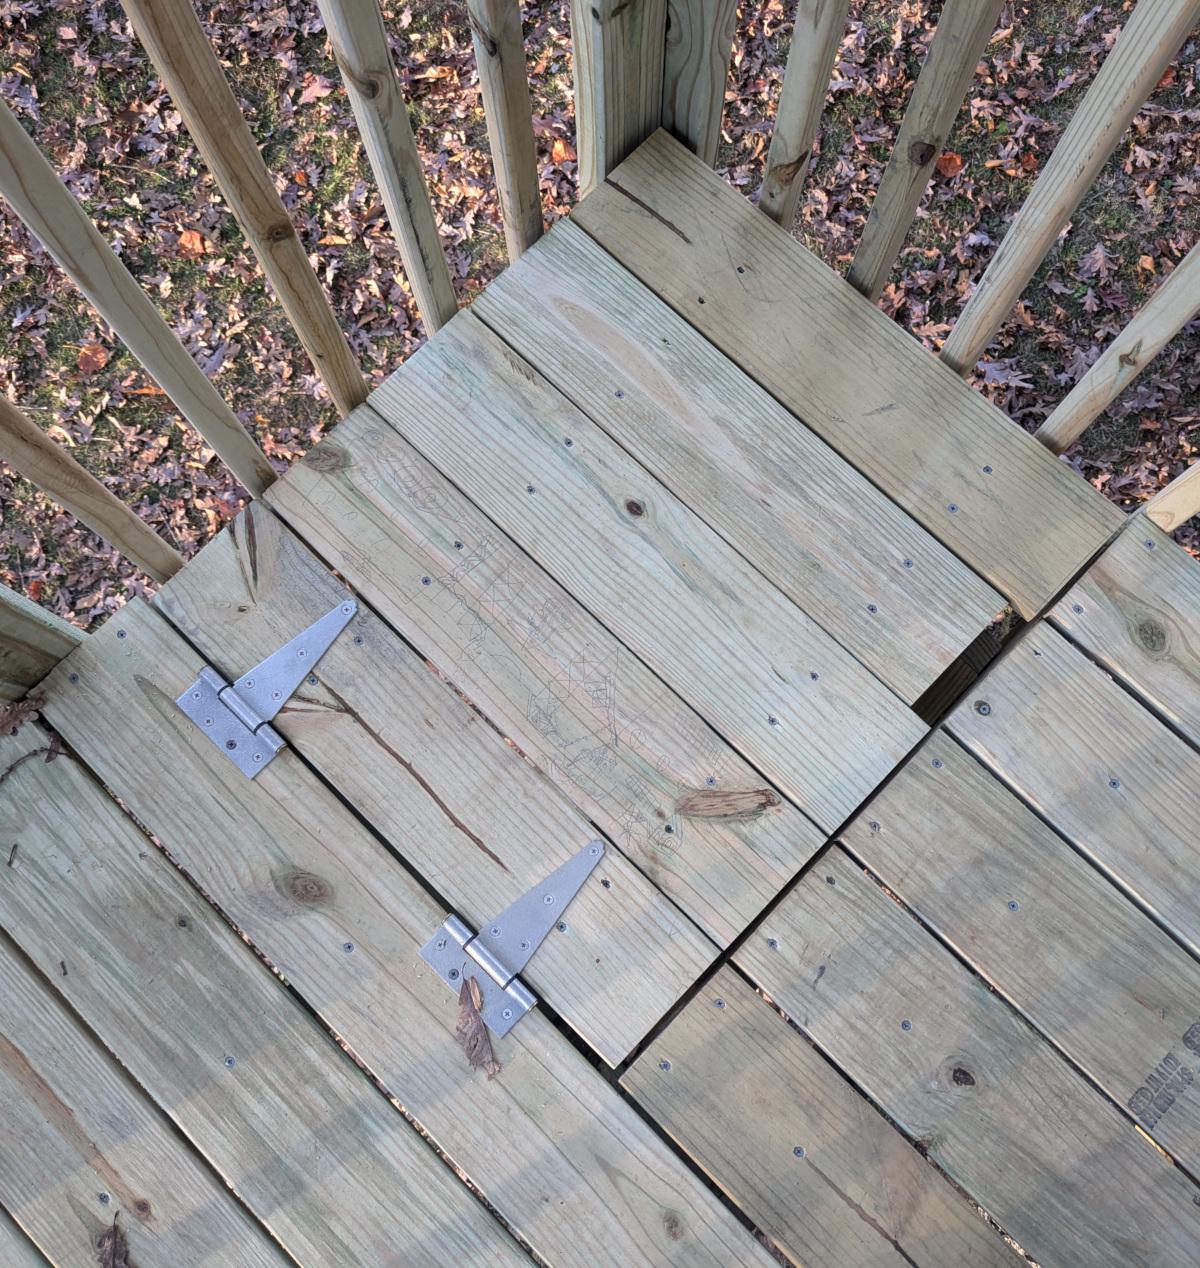
The only problem so far is that the trap door is heavy. Too heavy. The kids can’t open it from the ladder (or close it behind them on the way down), and it’s just a matter of time before someone’s fingers (or head) get smashed. I’ve contemplated using a spring and/or counterweight to help it move more easily but haven’t made a firm plan yet. For now, my wife and I just constantly remind the kids to be careful.
The whole thing cost almost $850. (That’s nearly all for materials; I already had the tools I needed aside from a couple drill bits and that replacement post-hole digger handle.) I could have saved maybe $25 to $50 by not buying the big packages of screws (I know I’ll use them all eventually) and by getting exactly the right amount of lumber (I have one or two unused pieces). Wood prices add up fast, especially when it’s pressure-treated.
The kids love their treehouse. They haul stuff up and down with ropes and have treehouse picnics and pretend it’s a boat or a castle or a plane. The worst injury so far is a splinter. I consider it a success.